
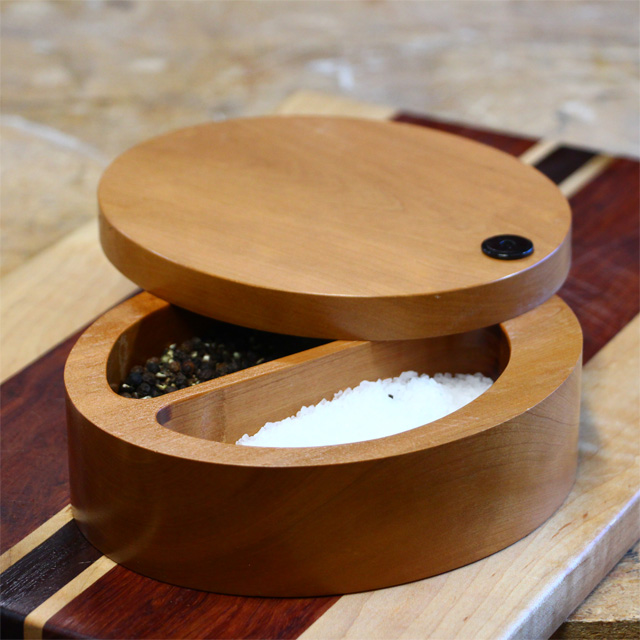
Even though Salt Cellars have been around for centuries, I just recently learned of them. I thought it would be a fun project and a nice addition to the kitchen, so I set out to make one of my own.
I started out by making a cutting/routing template in Illustrator. This would help a lot in the shaping process. If you would like to use my template, you are welcome to, and can download it here. After that, I got to work on flattening some awesome rough sawn cherry. I had to use a planer sled to remove a nasty twist in the wood. After that, I cut the piece to size, attached my template and cut out the outer shape. I was sure to cut to just outside the line, then sanded to the line. Then, I used a plywood template attached to the top of the piece, to remove material from the center on the drill press then I used a Bowl and Tray bit in my router to hollow out the compartments. After some sanding, I applied a couple light coats of lacquer to seal it up. The lacquer is completely food safe when cured. Lastly, I attached the lid to the base using a threaded insert installed in the base, and a bolt through the top.
The results are great. I filled one side with pepper and the other with salt. You could of course, fill it with whatever spices you’d like. This is a project that you could easily adapt to fit your needs. Its fun to make and very useful.
Need a bowl and tray bit? http://amzn.to/2CG88gt
Check out the whole build process here.