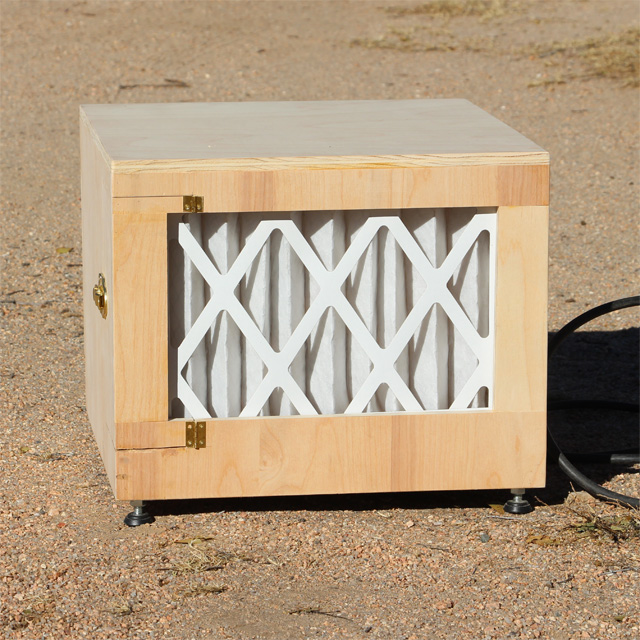
Time for some cleaner air in the shop. There are a lot of companies selling shop air filtration systems. I think they are a nice addition to any woodworking shop. They are costly though, coming in at around several hundred dollars. I know I can make one for less than that. Here’s my DIY version of a shop air filter.
I had this furnace blower assembly stashed away knowing I wanted to build this project. Its a smaller unit and perfect for my tiny shop. I also had a couple quarter sheets of 1/2″ plywood on hand. The first step was to remove some of the extra metal around the blower assembly. This was easy using my angle grinder and a cutoff wheel. Then I could begin cutting down the plywood. I used my circular saw to get the pieces into a more manageable size. On to the assembly.
I started by glueing on some cleats that would support the bottom of the blower assembly. Then it was a process of measure, cut, glue. Since I had a hard time making a plan ahead of time, I was making the cuts based off of the actual dimension. Building and cutting, as I go. This isn’t my favorite method of building, but it worked out OK for this build. Once the box was mostly complete, I added an electrical box and switch, then wired it up. After a successful test, I cut a piece of plywood for the top and buttoned it up. All that was left to do was install the filter and put it to work. I used a 2″ thick filter because I wanted to get as much surface area as possible, due to the small size I had to work with.
This little thing moves quite a lot of air. I’m excited to find a good mounting place for it and put it to work in the shop.
— Affiliate Links to Products Used —
Titebond 2 wood glue – https://amzn.to/2R3sVSN
Pin Nailer – https://amzn.to/2q9B3G5
Pin Nails – https://amzn.to/2q2pqAH
Mechanics Gloves – https://amzn.to/2q9Bss5
Safety Glasses – https://amzn.to/2S4psou
Here are some more shop project videos you might enjoy

