One of the best ways to get your cutting tools razor sharp, is to strop the edge on a piece of leather after sharpening. Its quick and super easy to make your own strop.
I started out with a scrap of leather that I got from my local leather shop. Using a straight edge, I trimmed the piece down to 2 ” wide, and about 12 1/2″ long. There wasn’t really any science in these dimensions other than thats what seemed to work. You could always go larger, or smaller to make it fit your needs.
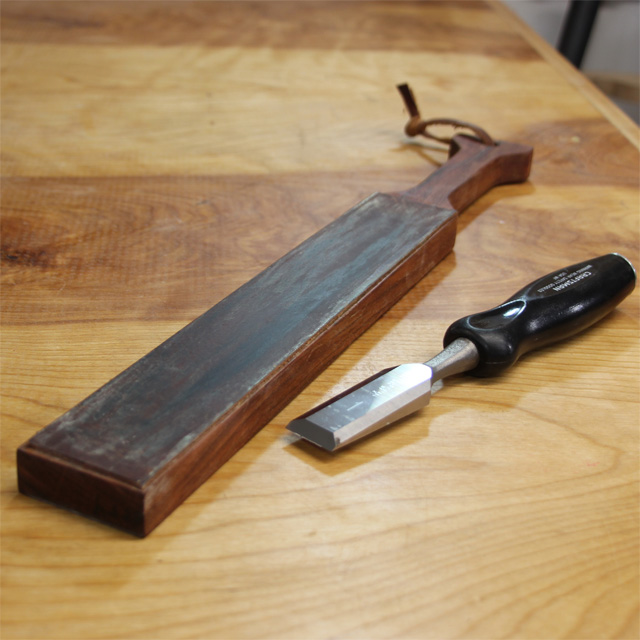
Then I found a piece of Brazilian Cherry to use for the handle, that had a really bad split in one end. I used some 5 minute epoxy to stabilize the crack. Most of it will be cut off, but there is a portion that will run through the handle. Once the epoxy had set up, I used a block plane to level it out, then I ran the board through the drum sander to flatten it all out. Next, I cut out a paper template and used it to mark out the shape of the handle. After a quick trim at the band saw, and some cleanup with a rasp and sandpaper, it was on to the drill press to drill a hole for hanging. I used regular wood glue to attach the leather to the handle. Once the glue had dried, I wiped on a coat of Boiled Linseed Oil, and tied a small strip of leather to the end. This is so I can hang it up.
My strop is complete. Now to try it out. I charged the leather with some green polishing compound and after a few swipes across it with a chisel, I could see some immediate improvements to the edge of the blade. Having a strop around is going to be great. This one will end up spending most of the time in the house to maintain edges on kitchen knives and pocket knives. I’m glad to have taken the time to make the strop.
Thanks for stopping by, and Happy Stropping.
Leather and Wood Sharpening Strop