
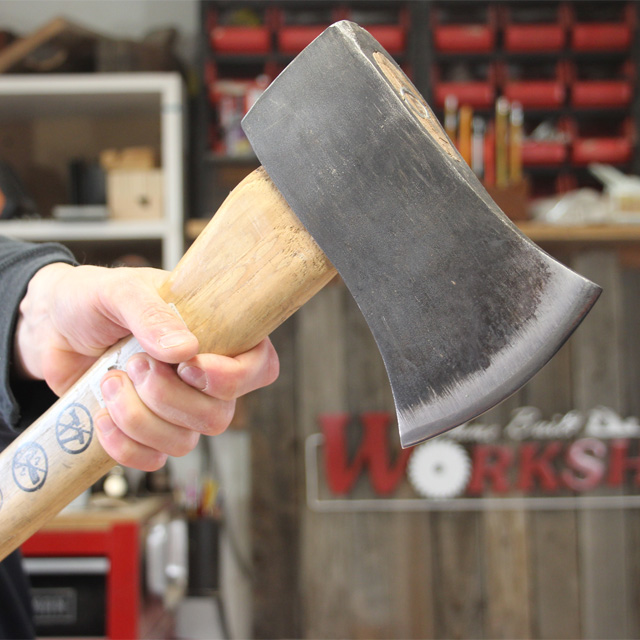
Last fall, we had some large Elm trees removed from our yard. These trees were dead and a danger to our home. Over the last couple of months, I have been working on removing all 4 of the large stumps. My Process was to slice what I could with a chainsaw, then chop and hack the rest away with an axe. My goal is to get them below ground so I can cover them with dirt. This was a ton of work, and was very hard on my hardware store axe. Now the edge is in need of a really good sharpening.
I’m going to do this sharpening mainly with a file. The one I’m using is a good Nicholson, Mill Bastard file. You can pick these up almost anywhere and they aren’t very expensive. Sometimes you can even find them with a handle included. Starting out with the Axe clamped to my bench, I’m going to lightly file the edge. I’m trying to get the angle correct. Once I get my angle of filing down, I’ll add more downward pressure and start filing. I’ll file for a bit on one side, then flip the axe over and file the other. I’m trying to keep the edge centered so I don’t want to file too much on one side. My goal is to remove all the nicks, dings, and scratches from each side of the blade. Using only the file, I was able to get it quite sharp. There would be nothing wrong with stopping here and using the axe. I wanted to take it a couple steps further in the sharpening.
In order to step it up, I grabbed my Lansky sharpening puck. This is a great little sharpening stone for these kinds of jobs. I applied some oil to the stone and began sharpening with the coarse side of the stone. Once I have removed all the file marks from both sides of the blade, I switched to the fine side. As you change grits, the goal is to remove all marks from the previous grit. My last step was to strop the edge using a leather strop. I made these leather strops, and you can see the video of it right here. This is where it gets really sharp, but you must do all the previous work before this step.
After all of this work, the axe is shaving sharp, and ready to be put back into use. Its really worth the effort to get and maintain an edge like this on your tools. They cut so much better and you reduce the risk of the tool glancing off something, so it makes it safer too. Want to see how I did it? Check out the video below. Thanks for visiting.
— Afilliate Links —
Lansky Puck – https://amzn.to/2EaV9ri
Nicholson File with Handle – https://amzn.to/2TND5sw
12″ Handscrew Clamp – https://amzn.to/2TKJXqE
3 in1 Oil – https://amzn.to/2E9Tfa0
Visit my Amazon Storefront to see the products listed above, and a lot more tools and things I own and/or recommend.