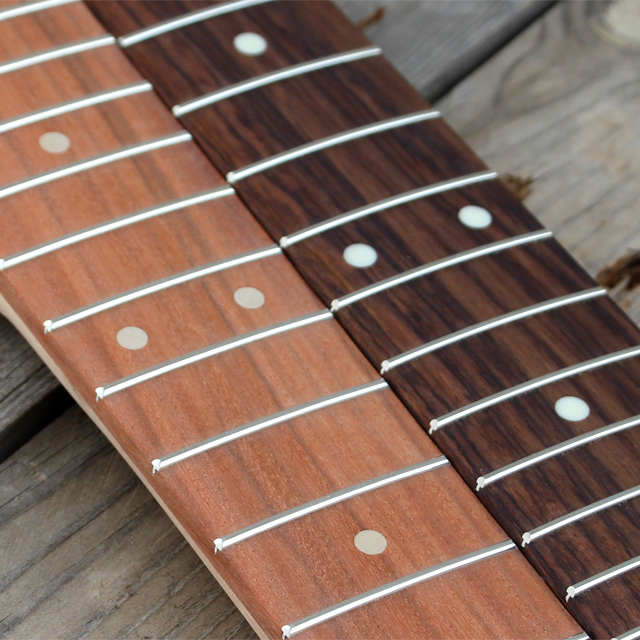
This is the second video in my Guitar Building Basics collection of videos. This time, we’re talking about Fretboard Markers, or Marker Dots.
There are a lot of options when it comes to fretboard markers. You can go from simple to elaborate and just about every shape and size in between. The markers I’ll be making here are 1/4″ round markers made from colored epoxy. Here’s my basic process for installing them.
First I make sure I have a good centerline on the fretboard. Usually, I already have one drawn on there, but if its not easily seen, I’ll measure and redraw it just to make sure. Now, I will draw lines on the diagonal from fret slot to fret slot to create an X. This will be the center point between the frets and should fall on the main centerline. This is where the marker dot will go. I’ll use a sharp awl to make a tiny indent on that X, then follow it up with a larger center punch.
Now using a forstner bit, or a standard brad point bit, I’ll drill out those marks. I want to go deep enough so I don’t sand off the marks while radiusing the fretboard, but I sure don’t want to drill through the fretboard, and into the truss rod channel. After lightly sanding off any burrs from the drilling, Its now time to install the markers.
There are tons of options for marker dots. You can get many different premade versions from materials like plastic, pearloid, Mother of Pearl, and clay. You could choose to make your own using a plug cutter and some contrasting wood, or you could use some colored epoxy like I’m doing for these necks. I’ll just mix up the epoxy with the pigment added and drip it into the holes. Then I’ll pass a torch over the epoxy. The heat from the torch helps remove any trapped air bubbles. Now I’ll let the epoxy dry until completely cured. At that time I can proceed with radiusing the fretboard like I normally would.
If you choose to use any other type of material, just make sure you use any recommended adhesive for them. Some markers specify epoxy be used to glue them in, others are fine with wood glue or CA glue. Also, don’t be afraid to try other materials that may not be used for this type of application. Make some test boards and experiment. Its fun, and you may just find a really awesome look.
I hope you found this video helpful. If there’s another topic you’d like me to cover just let me know. Thanks for stopping in.
Guitar Building Basics: Fretboard Markers