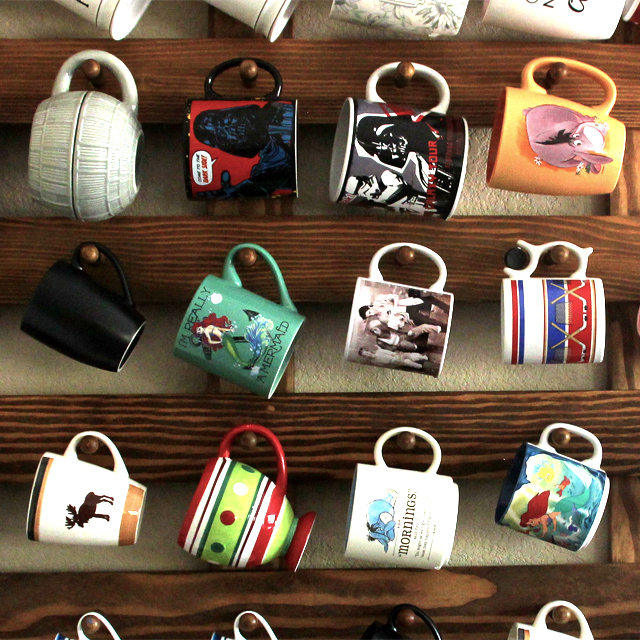
I was recently commissioned to build a coffee cup rack. I immediately thought of something that would hold 5 or even 10 mugs so I thought it would be no problem. After getting more info from the customer, I found out that they needed the rack to hold 40 to 50 cups. This was going to be wayyyyyyy bigger than I thought. I still accepted the commission and headed off to the lumber store.
I chose some S4S Hemlock for this project. Its less expensive, and looks nice with some finish on it. I began by getting the pieces cut to length on the crosscut sled. This was quite difficult to do, because I don’t have room to work with these 8 foot lengths. After some wrestling with it, I got things cut down. Next, I applied masking tape to the boards so I could use a pencil to lay out for the Mug Pegs. After center punching 49 holes, it was off to the drill press where I used the depth stop and a 1/2″ Forstner bit, and drilled for the pegs. Now for the tricky part. Assembly.
I knew this part would get tricky. This piece is almost 4″x4″ and I have no space to work. I made up a spacer block with the spacing I would need around the edges. This would help me align the outer pieces where I applied some glue, pinned it in place, then clamped it to dry. Once it was dry, I glued on the individual slats using another spacer to keep the slats evenly spaced. I glued them, pinned them and clamped them to dry. The last step was to glue on the center support. I was quite relieved when this gluing part was done. This was the hardest part of the whole build. The last part was to reinforce the glue joints with some dowels. This was to make sure nothing could ever come apart. I always opt to overbuild things for safety. Now for some sanding before installing the pegs.
Speaking of pegs, I ordered up a bunch of Mug Pegs. I didn’t know that’s what these were made for until researching them for this project. I shortened the tenon on the pegs just a bit before glueing them in. This was to ensure they all seated in the hole properly. Now I could apply glue and glue all 49 of these in place. Piece of cake. After drilling some mounting holes and some final sanding, it was time for the finish.
Walnut Danish Oil was the finish of choice for this, and I agree with it 100 percent. After applying the oil to that Hemlock, it took on a look that I really like. Once it dried, it was delivered and installed. It looks great and fit the customers space perfectly.
I’m really happy with this project. I think I might need a much smaller one for my house now. Check out the video below.
— Afilliate Links to Products Used —
Mug Pegs – https://amzn.to/2YShXTQ
Titebond 2 Glue – https://amzn.to/2YShdOS

