
I recently found this cool Stanley #4 Hand Plane at an antique store. It was all rusty and crusty, and the rear tote was missing. I thought it would be a good candidate for a restoration. I could make a new tote, get a replacement bolt, and restore the plane. So I bought it. It was a great deal. Most of the rust was surface rust anyway so this was going to be easy. Or so I thought.
I wanted to have all the parts ready before I started restoring it, so I went to the Stanley website and tried to get a replacement rear tote bolt. I couldn’t find them anywhere. I ended up contacting Stanley directly and they told me that those parts are no longer available. Great. I put out a call for help in one of my weekly live streams and, Scott reached out to me and hooked me up with the bolt and brass nut I needed. Thanks so much Scott. I really appreciate it. Time to move on with this project.
My first order of business was to make a new rear tote. Its hard to hold on to this plane without it. I found a great template on the Lee Valley website. It has all the information you need. Here’s a link if you need it. I used a piece of Sapele for the new tote. Its not an exact match for the Rosewood front knob but I’m not worried about that. Using the Lee Valley template and instructions I got the new tote all cut out and shaped. I used a combination of Rasps, Files, and Sandpaper to shape the new tote. With it all completed, I was now able to start restoring the rest of this cool plane.
For most of this restoration, I followed the steps I learned from Paul Sellers in his fantastic video. You can check it out here. Paul is a great teacher and I followed a lot of his process. This part of the restoration is a lot of work. Be prepared to spend a lot of time sanding, cleaning, sharpening, and polishing. I’m using a flat sanding beam to level the sole of the plane as well as flatten the sides and sharpen the blade. To finish sharpening the blade, I made a few passes on my homemade leather strop. You need to make yourself a strop. See how here. After many, many hours of work, I got all the parts cleaned up to a point I was happy with it.
Now I can begin to put this all back together. One piece at a time, I oiled and reinstalled each part. Every screw, thread, and moving part got a little drop of oil before being put into place. The Knob and Tote got a fresh bath of Boiled Linseed Oil to preserve and protect it. Finally I installed the freshly sharpened blade, and polished out the lever cap. Time for a test cut.
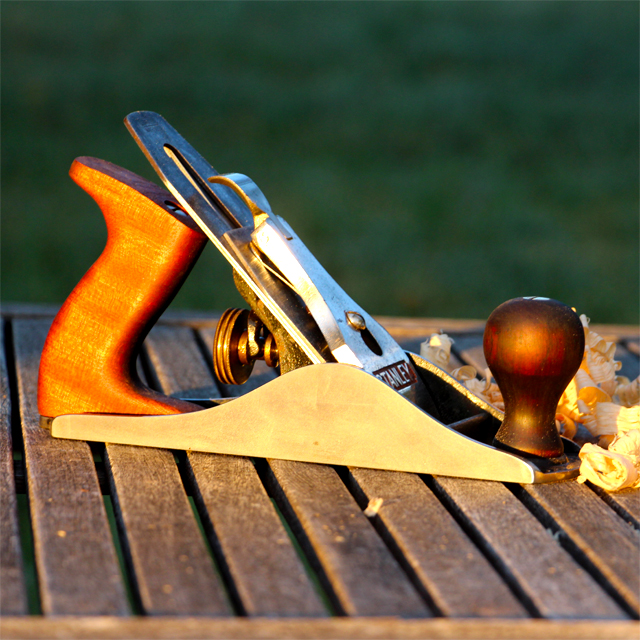
As I slowly brought the blade out on a test piece of white oak, I began getting a nice whispy shaving. The plane seems to cut good, even on a hard wood like this oak. I’m calling this project a huge success.
Its awesome to start with a rusty, unusable tool and end up with one that looks as nice as this does. I like this manual method of restoring tools. After spending so much time sanding and cleaning on it, I really feel the connection to the tool. I think its much better that just taking a grinder to it and calling it good. If you have an old tool like this, don’t be afraid to take on the restoration project. Its fun and will make the tool last for many many more years.
Check out the restoration video below. Thanks for watching!
— Afilliate Links to Products Used —
Mirka Gold PSA Sandpaper, 120 – https://amzn.to/321mXY7
Mirka Gold PSA Sandpaper, 220 grit – https://amzn.to/3421EqY
3 in 1 Oil – https://amzn.to/2ZrTNUk
Boiled Linseed Oil – https://amzn.to/2ZkOAys
Sharpening/Honing Guide – https://amzn.to/2Hp5XDm