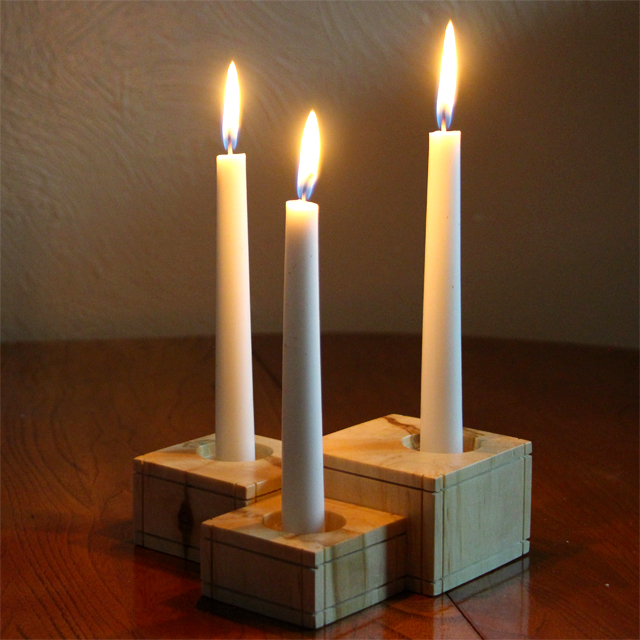
Well, the Christmas season is in full swing. We tend to use a lot more candles during this time of the year. That got me thinking of a project I made with my Grandpa more than 30 years ago. I decided to try to recreate this project with a chunk of Aspen.
I started out by flattening one side of the log with a drawknife and handplane. Once I established a flat surface, I then ran it through my planer, to get 2 parallel sides. Now I can run the flat sides against the fence on my jointer, to create a square corner. Lastly I’ll run the newly jointed edge on the planer again to create a square. I know there are better ways to do this, but using the equipment I have, I found this to be the best.
Now that I have my stock milled to size I can move on. Using a small crosscut sled I made for the bandsaw, I cut the 3 stairstepped pieces to their final height. Each piece is 1/2″ less in height than the other. They also need to be 1/2″ less in width and depth, so I clamped the pieces in place and trimmed 2 of them down on the table saw.
Next, I marked out where I wanted to drill the holes for the candles. The original only had a hole for taper candles, but I wanted to make this one hold both a standard taper candle as well as a tea light candle. After marking out the holes, I used a 1 1/2″ Forstner bit to drill just less than the depth of a tea light, then switched to a 7/8″ Forstner bit to drill for the taper. Time to jazz this up a bit.
I set up a couple stop blocks at the band saw and proceeded to create some shallow decorative cuts around each of the blocks. I vividly remember when Grandpa did this so long ago. (Although, I think he free handed it instead of using stop blocks.) I remember how cool it was that he could add this detail with the band saw. I had only seen it used to cut wood, not to make details like this. After making these cute, a quick swipe of some sandpaper cleaned up the cuts. Time to glue.
I applied glue to the blocks and clamped it up. This was an interesting glue up. Not hard but definitely a little awkward. I worked on the conrer of my table so I could get clamps all around. Once the glue dried, I sanded just a bit more before applying several coats of satin spray laquer. Now all thats left to do is add some candles and enjoy.
I’d like to insert a quick word of caution if you make a project like this. Please use caution if making a candle holder. Make sure things are safe and candles are held securely. Consider using a metal insert for taper candles as they can help protect wooden holders as well as hold the candles securely. Just be responsible for yourself, be safe and have fun.
I enjoyed the memories that came up as I was making this project. I learned a lot from working with my Grandpa and this was a great project to bring back some of those memories. You can follow along with the video below.
— Affiliate Links to Products Used —
Titebond 2 Glue – https://amzn.to/2E2z90w
Combination Square – https://amzn.to/2PrY4A3
Rikon 10″ Bandsaw – https://amzn.to/2RtlOGK
1.5″ Forstner Bit – https://amzn.to/36hfJ4h
7/8″ Forstner Bit – https://amzn.to/38kjWpF
Irwin 24″ Clamps – https://amzn.to/2OZVh1Y
Deft Satin Spray Laquer – https://amzn.to/344uFkP

