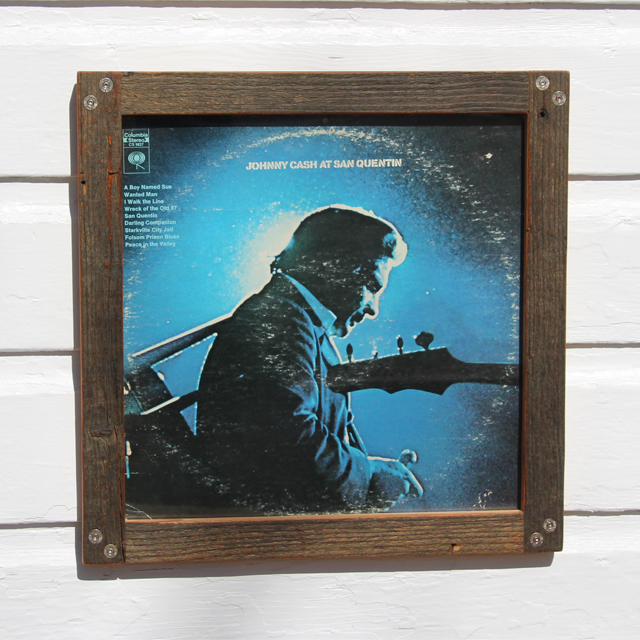
Have you ever wanted to make a frame for something but maybe you don’t have a great way to cut accurate miters? Or maybe you just want to try a different method to make your frame. Here’s an easy way to make you frame that doesn’t require any miter joints at all. We’re going to use a half lap joint for our corners.
I started out with a warped piece of barn wood for my frame. I love the weathered and worn look of barn wood. After slicing off the warped piece of wood, I could joint one edge on my freshly de-rusted jointer, then rip the board into strips. I cut the pieces to the same length I would use if I was going to miter the corners. Now on to the half laps.
I half lap joint requires removing half of the thickness of each board so that they can overlap each other forming our 90 degree corner. I set up my crosscut sled on my tablesaw and adjusted the blade to a height that is half the thickness of my boards. I recommend using a test piece first to make sure your blade height is correct. Then I clamped on a stop block so I could only cut the half lap as wide as the boards are. Now I can just nibble away the material by making several passes over the blade. Make sure you keep track of your cuts because the material needs to be removed on opposite faces of the wood in order for them to fit together correctly.
After cutting the joints, its time to add some glue and clamp the frame together. One of the cool things about a joint like this is that its self squaring. As long as your saw cuts true and square, your joints will be square as well. It never hurts to check though.
After the glue dried, I used a Rabbeting bit in my router to cut a rabbet that will accept the glass and artwork. This leaves a rounded corner that’s easy to square up with a sharp chisel. Now its time for my favorite part. Sanding. I sanded it only enough to smooth out the edges and remove sharp corners and splinters. I didn’t want to remove the barn wood surface.To reinforce the joints, I drilled a few holes in the half lap and epoxied in some spent bullet casings a friend gave me. You can use wooden dowels of you want, but I thought this would be a cool look. I applied a couple coats of my homemade finish (see how I made it here) and moved on to cutting the glass.
I used a simple glass cutter to cut a piece of plate glass to fit my frame. If you have never cut your own glass before, don’t be afraid to try it. Its surprisingly easy to do. Just be safe. The cut edges are very sharp. Once the finish is dry, I added a sawtooth hanger, popped in the artwork and a piece of cardboard for a backer. I used some Flex Points to secure the artwork in the frame.
Thats it. I really like how this turned out. Its an easy way to make some cool frames. Check out the build video below.
— Affiliate Links to Products Used —
Minwax Wipe on Poly – https://amzn.to/38KxA4C
Mineral Spirits – https://amzn.to/38P2F70
Boiled Linseed Oil – https://amzn.to/38KHfYL
Total Boat High Performance Epoxy – https://amzn.to/3dhcsGx
Titebond 2 Wood Glue – https://amzn.to/2UopadV
Irwin 12″ Bar Clamp – https://amzn.to/2WvKOQc
Below are a few other videos you might enjoy.

