
I need to build a new picture frame to replace one that had broken. All I have left is the cardboard backer from the old frame. I decided to try to build this without actually measuring anything. I want to use the existing backer and some relative dimensioning to get all the sizes. This should be a fun challenge.
I grabbed a piece of Aspen to use for the frame. I jointed one edge on the jointer so make sure its straight and square. I discovered a small knot hole on one part of the board that I decided I should fill in. I used some brown CA glue from Starbond to fill it in. I really like the brown glue as I think it blends in a lot better with most woods.
If you’d like to get yourself some Starbond Adhesives, visit their website and use code HomeBuilt10 at checkout to save 10% on your order.
With the knot filled, I ripped the piece into strips that would become the sides of the frame. Then at the router table I set up a straight bit to cut a little higher than the thickness of the backer plus the Acrylic I plan to use for the front. I then ran the pieces along the wooden fence of the router table to incrementally cut a rabbet that was roughly 1/4″ wide. I say roughly because I didn’t measure it out, but its close to 1/4″. Then I switched the straight bit out with a chamfer bit and cut a small chamfer around the inside edge of the pieces.
Now I’m ready to cut the 45 degree miters. I’m using my miter sled to make these cuts. I first cut one set of pieces to make the first 90 degree corner. Then I placed the cardboard backer into this corner and made a couple of pencil marks at the end of the backer. This marks where I need to make my next cuts. Be sure to account for the width of the rabbet when making these cuts. Be sure to watch the video for more clarification on this. Its important. I continued marking the remainder of the pieces using the backer as my guide until I had all 4 sides cut to length. Now I can glue it all up and use a handy strap clamp to clamp it together. While the glue was drying, I cut my clear acrylic to size using the backer to set the table saw fence.
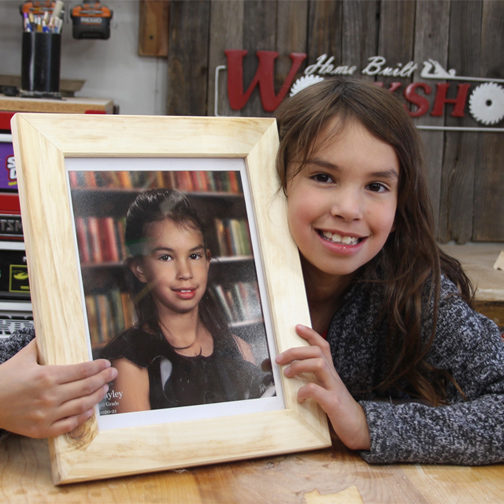
Once the glue had dried, I added another chamfer around the outside edge and sanded the piece smooth. I finished it off with a couple coats of satin spray lacquer. I like spray lacquer because it dries super fast. I can quickly move on and insert the acrylic, picture and backer. I’m holding it in place with some flex points. You can just as easily use finishing nails too. This frame is done.
This was a fun little project and it was kind of nice to not worry about measurements for a change. Its sometimes good to try something different once in a while. Try different things and different methods that might challenge yourself. Thanks for stopping by. Check out the video below.
— Affiliate Links to Products Used —
Titebond Original Wood Glue – https://amzn.to/3bhlRyB
Bessey Strap Clamp – https://amzn.to/3uDBrMz
— Here are some other videos you might enjoy —