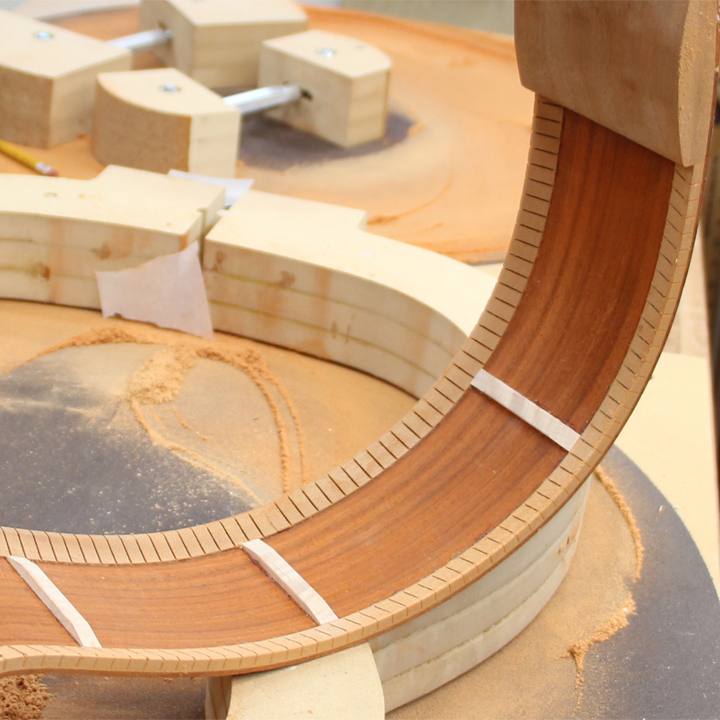
Now that the guitar sides are together, I need to add the kerfing and some bracing. The kerfing is there to add some glueing surface for the top. The sides are much too thin to get a good glue joint by themselves, so kerfing is added to thicken this area of the guitar.
Installing kerfing requires a lot of clamps, so I made my own from clothespins and rubber bands. Its very inexpensive and works great. I’m using standard kerfing made from spanish cedar for this build. There are tons of options but this one smells amazing. I broke the kerfing into pieces to make the process easier, then began glueing the strips in place making sure the kerfing is just proud of the sides. This will give us some room to radius it flush later. This went pretty quick overall. I did take some time to try to fit the ends to the neck and heel blocks as best I could. Once that was dry, I moved on to cutting and shaping some small pieces of maple to brace the sides. I glued on 5 braces per side. You can use about any species of hardwood for this, but I decided to keep with my maple/padauk theme.
With everything glued in, its back to the radius dish to level the kerfing to the sides. This went pretty quick as well, since most of what needed to be sanded was the soft cedar. A side benefit of this sanding was the great smell of the cedar. Bonus!
Now I can remove the sides from the mold for the first time. This was exciting. All thats left is the end wedge, and I’ll have a finished rim. I can’t wait. Thanks for stopping by.
— Here are some other videos for you to enjoy —


