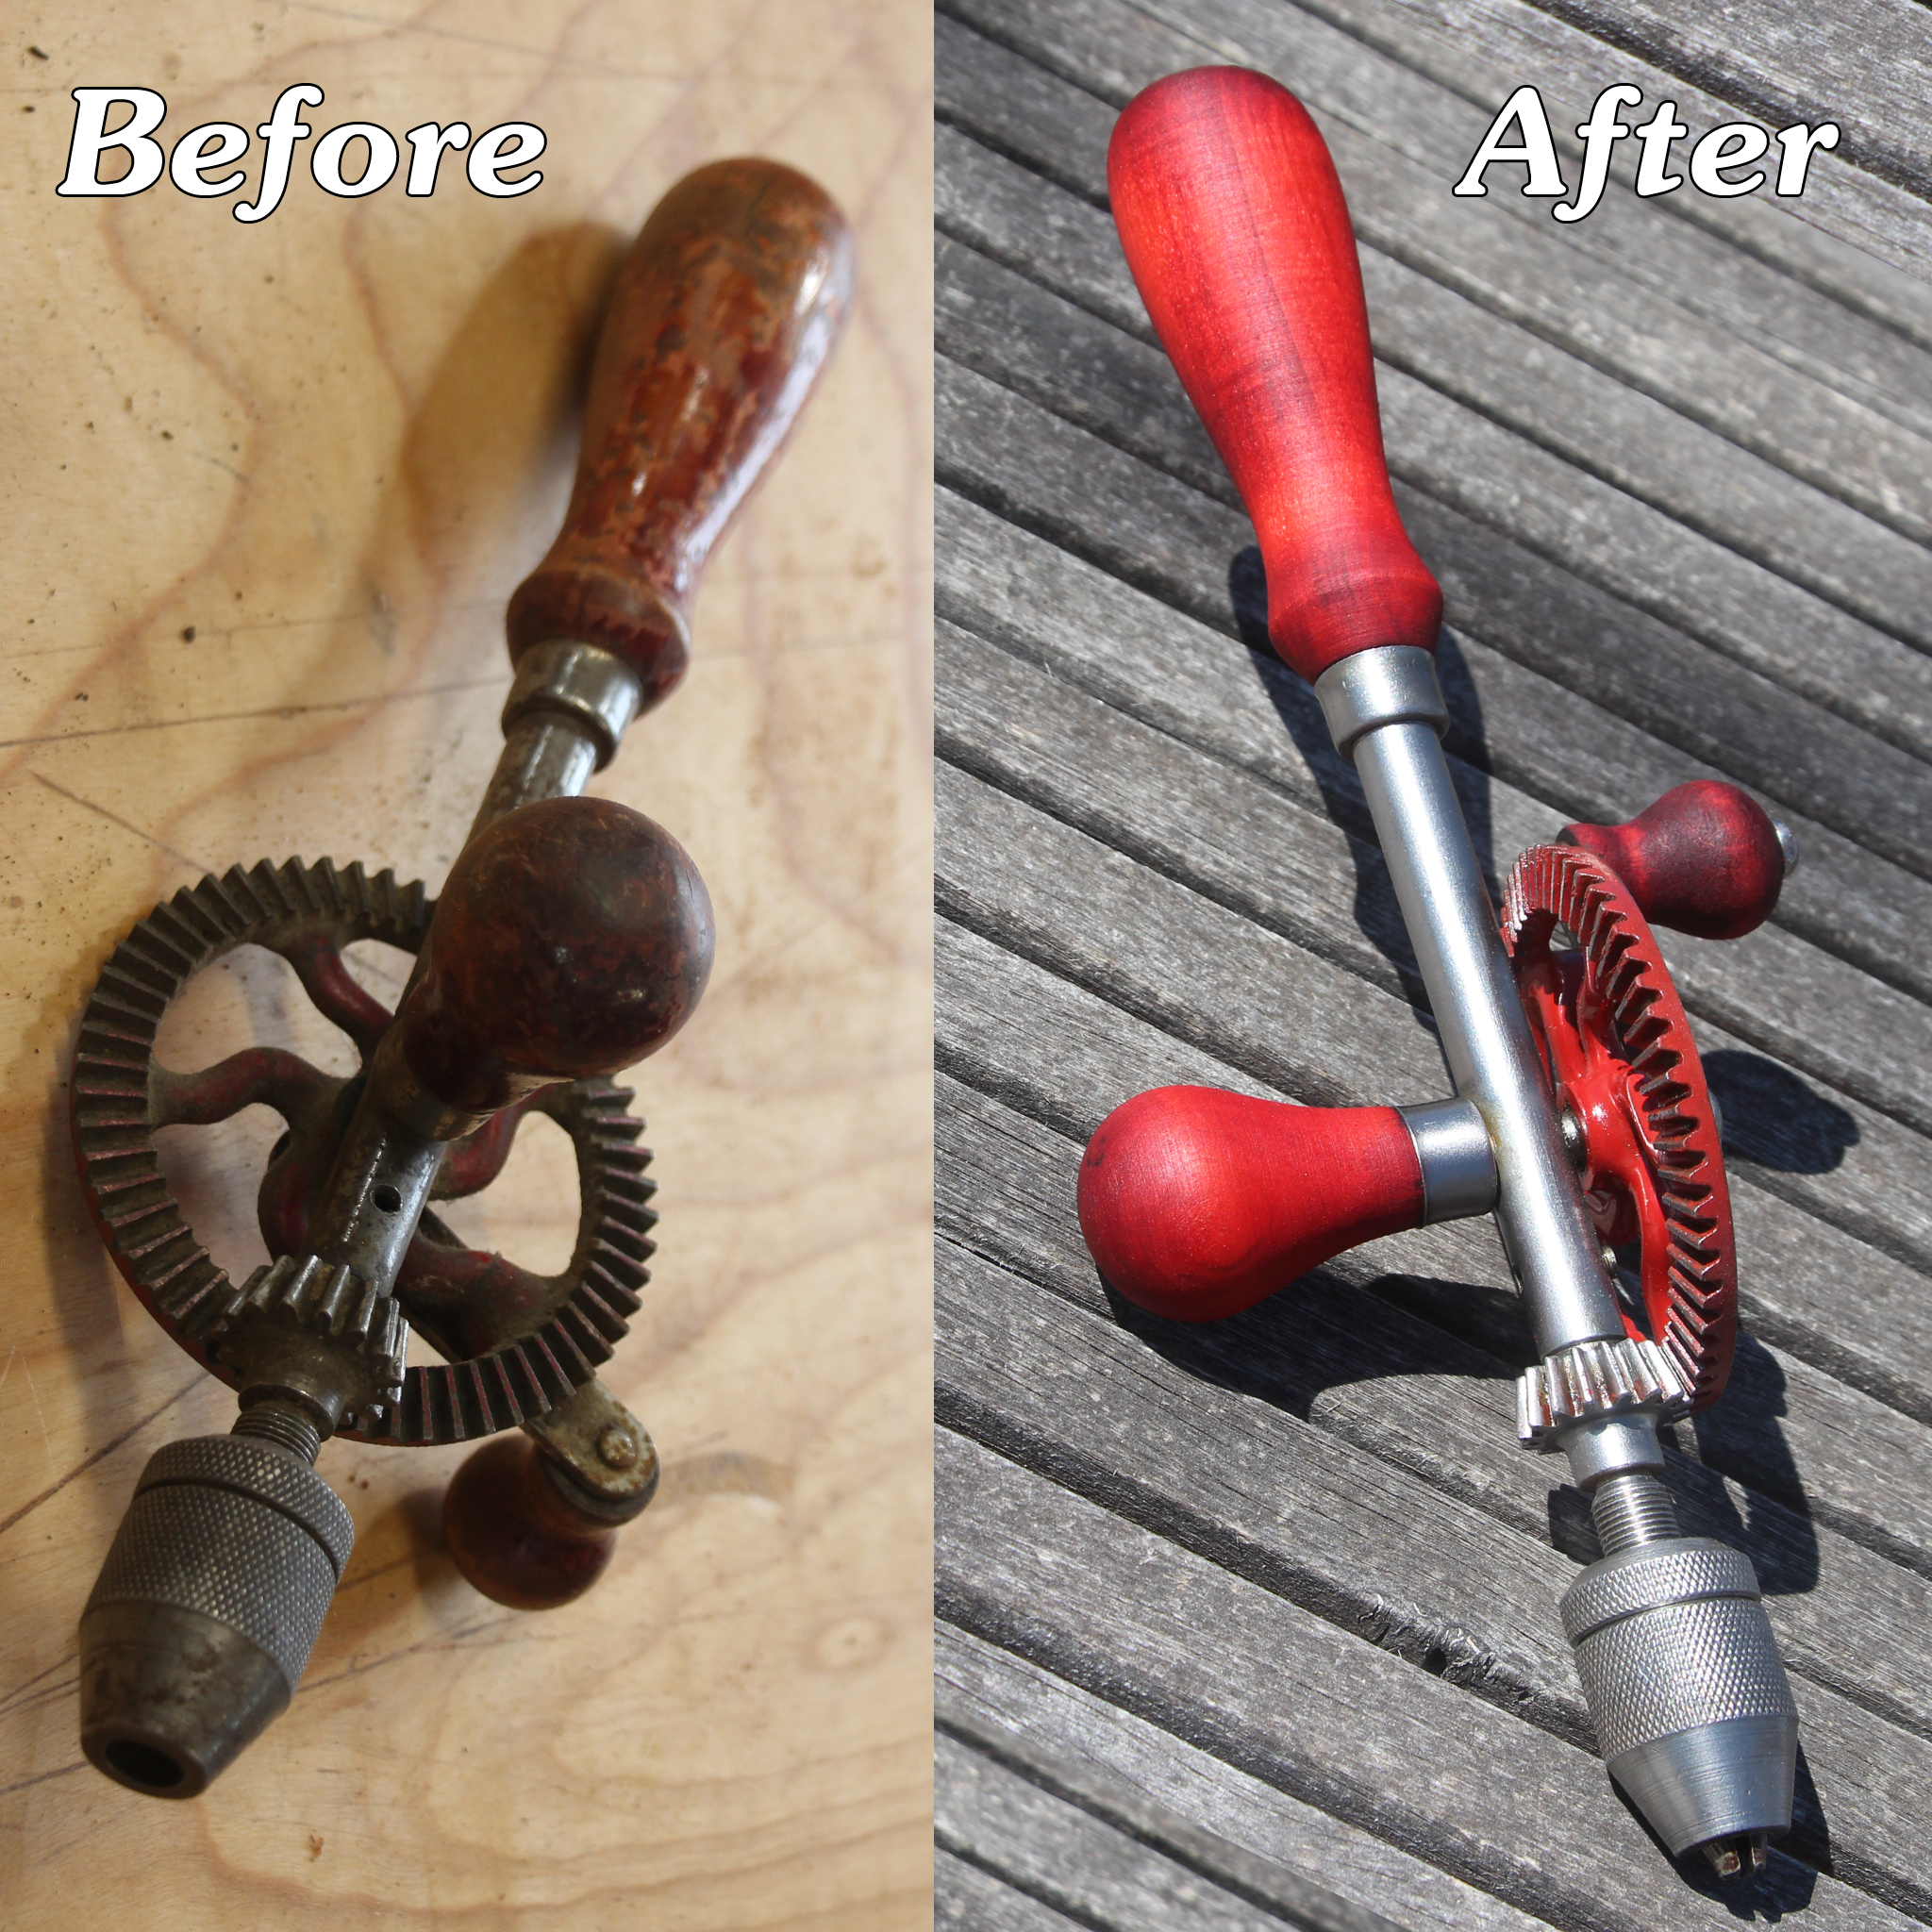
I recently picked up this Egg Beater Drill on Ebay. It was really cheap. The shipping was more then the tool itself. Its just an unbranded, Made in the USA drill. I though it would be perfect to practice some restoration skills on it.
The first step was to completely disassemble it and get it cleaned up. Once I took it all apart, I soaked the metal parts in some white vinegar to help remove some rust and dirt. This drill wasn’t very rusty to begin with but it could use a cleanup. While the pieces soaked, I began sanding the wooden handles. Using a bolt, I chucked the handles in my drill press, while I used sandpaper to sand them down. I wasn’t able to get all the original finish off the handles. It was deep into the pores of the wood and I didn’t want to risk sanding them down that far. The original finish was a reddish color and I was worried the handles would turn pink if I applied finish over it. Not being one who wants pink handles, I decided to apply a bright red dye. THis would cover up any pinkness for sure. (bonus fact: Red is my favorite color) ONce that dye was dry, I applied some Boiled Linseed Oil to them and set them aside to dry.
Now that the metal parts have had time to soak, I grabbed a small wire brush and gave the pieces a good brushing. This removed the majority of rust and dirt. I finished this cleaning by using a wire wheel on my bench grinder. This really cleaned them up. Now I could begin the reassembly, until it came to the chuck. Unfortunately, this drill was missing the 3 small springs inside the drill chuck. The ebay listing did not say this, or I probably wouldn’t have bought it. Anyway, it was now up to me to make this work. I decided to try making my own using a guitar string. I found a drill bit that was a little smaller than the final dimension I needed. I chucked it into my drill backwards. This was to make it easier to remove after winding. Then I took a .017″ guitar string and jammed one end into the chuck to hold it. It doesn’t take much pressure to keep it in place. Then, running the drill on slow, and holding the end of the string with pliers, I was able to wind my own spring. This worked great. It took a couple of practice tries to get it right, but I couldn’t be happier with the result.
Now, I can use my new springs in the chuck and finish the assembly. After oiling up all the critical points, my new old drill works awesome. Check out the video in the link below. Thanks for watching!
— Affiliate Links to Products Used —
Brass Wire Brush – https://amzn.to/2JAneeD
White Vinegar – https://amzn.to/2LyOP2i
Masking Tape (better quality than I used) – https://amzn.to/2Jz8IUd
Wire Wheel – https://amzn.to/2VyoW7e
Sewing Machine Oil – https://amzn.to/2VVIdz7

