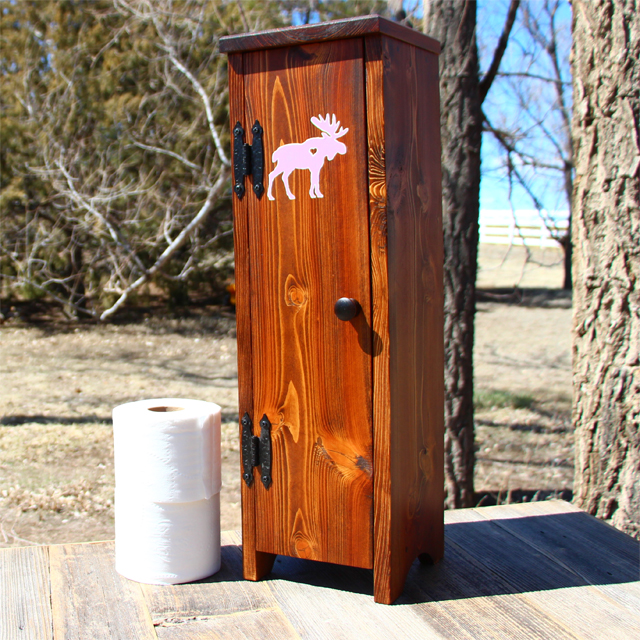
I’m building a Toilet Paper Cabinet! Yes, I know. At this time of the year (April 2020) this sounds a bit strange. As toilet paper seems to be short supply. Whats a better time to build a little cabinet like this.
I started out by making a trip to my local hardwood dealer, JW Hardwoods in Peyton, CO, where I picked up a piece of rough sawn pine. Rough sawn lumber can be a great value if you have the ability to machine it smooth. I first started out by planing the board smooth. Then I used my circular saw to break down the piece so it was easier to manage. Next, was a pass on the jouinter to smooth up one edge, before using my crosscut sled and table saw, to cut them to final size.
Now on to the glueup. I’m using simple butt joints for this cabinet. Its not going to see any heavy loads so these joints will be plenty strong. I first glued on the top and bottom, then the 2 sides, followed by the top. The top only got a little glue in the center then it was secured by a couple screws. This should allow just enough room for any expansion and contraction. Now, we’ll reinforce all the joints with dowels. I’ll just drill some holes for the dowels and glue in a hardwood dowel. If there were any doubts to the strength of the joints, this should reassure you. Now after a few minutes sanding everything flush we can add all the hardware. I’m drilling all the holes with a Self Centering Drill Bit. These things are awesome and I’d highly recommend getting a set if you can. They make quick work of installing hardware.
After all the hardware has been installed, I’ll take it all back apart and apply some stain. The stain I’m using is made by Minwax, its called Honey. I like the darker color and think it will work great on this pine. After the stain has dried, its time to add some personalization to this project. Using the Ink Jet Transfer Method of transferring a pattern to wood, I transferred a moose design on the front. Using some Acrylic craft paint, we painted in the little moose by hand. I was initially going to laser engrave or CNC the moose in but with all the shutdowns we’re facing right now, those places are all closed. I’m actually happy about this because I think I like the splash of color the paint gives. It makes it POP a little.
The last steps were to apply a couple coats of satin lacquer and reassemble the cabinet. I really like how it came together in the end.
Check out the build video below.
https://youtu.be/JgIPRdkoOwc
— Affiliate Links to Products Used —
Deft Satin Lacquer – https://amzn.to/2XNeQiT
J Roller – https://amzn.to/2VjTGrb
Snappy, Centering Drill Bit Set – https://amzn.to/3aiJ4wW
Wooden Knobs, 1″ – https://amzn.to/2Vhqxg1
Minwax Honey Stain – https://amzn.to/3euiaVX
Here are some other videos you might enjoy.

