
Have you been putting off installing binding on a guitar you’re building because you feel a bit intimidated by the process? I know I have. For a long time, installing binding just seemed a bit scary to me, and for no good reason.
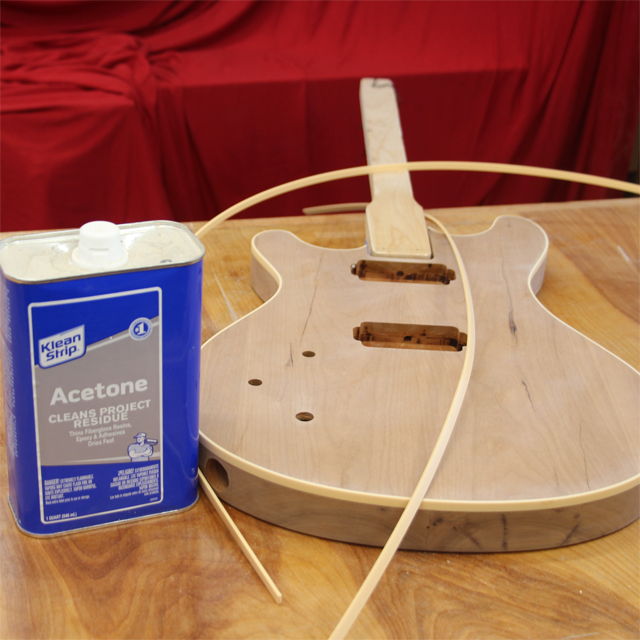
A bound guitar body or neck looks awesome. The process isn’t difficult at all if you have the proper router bits and just a little practice. For my demonstration, I’ll be installing plastic binding using acetone. I’m not using any glues or other adhesives. The process of using acetone works on plastic binding because the acetone partially melts the plastic, and as the plastic dries, it adheres itself to the wood. Thats it. Of course if you want to use wood binding, you will have to use a suitable adhesive, but for this guitar I’m working on, acetone is all I’ll be using.
Don’t let binding your next build intimidate you. Do a few practice pieces first, and I know you’ll be able to do it.
Thanks for stopping by.
— Affiliate Links to Products Used —
Amana Tools Rabbeting Bit Set – https://amzn.to/3bYMN6h
Acetone – https://amzn.to/3hUxj7j
Stew Mac Tape Dispenser – https://amzn.to/3yCVoWd
Stew Mac Binding Glue (if you want that instead) – https://amzn.to/3upvim5
Stew Mac Brown Binding Tape – https://amzn.to/3wJw9jj
Card Scraper Set – https://amzn.to/3wCfdLf
Single Edge Razor Blades – https://amzn.to/3yHZHzj
— Here are some other videos you might enjoy —